Upload Multiple Files/Images with Drag and Drop Using DropzoneJS in Laravel
User experience is given great importance in web applications today. Filling out forms is a boring activity for users. That’s why it’s the application developer’s job to make it easy to fill out forms. In this post, I will explain how users can easily upload multiple files and images in applications developed with Laravel.
In the example I will explain below, I will use the javascript dropzoneJS library. DropzoneJS library is a simple, lightweight and useful library with a progress bar.
1.) Installation Laravel Project
If you have composer installed on your computer, you can create your laravel project by running the following line of code in the terminal.
composer create-project --prefer-dist laravel/laravel dropzone-laravel-project2.) MySQL Database Settings
We define our Mysql database settings in the .env file of the Laravel project.
DB_CONNECTION=mysql
DB_HOST=127.0.0.1
DB_PORT=3306
DB_DATABASE=myLaravelDb
DB_USERNAME=root
DB_PASSWORD=
3.) Creating Model and Table in the Database
First, we create our model named ImageGallery and the migration file by running the following line of code.
php artisan make:model ImageGallery -mWe have created a file named 2021_07_19_144128_create_image_galleries_table.php. By opening this file, we define the columns we will create in the database.
class CreateImageGalleriesTable extends Migration
{
    /**
     * Run the migrations.
     *
     * @return void
     */
    public function up()
    {
        Schema::create('image_galleries', function (Blueprint $table) {
            $table->id();
            $table->string('original_filename');
            $table->string('filename_path');
            $table->timestamps();
        });
    }

    /**
     * Reverse the migrations.
     *
     * @return void
     */
    public function down()
    {
        Schema::dropIfExists('image_galleries');
    }
}
After editing the file, we migrate it.
php artisan migrate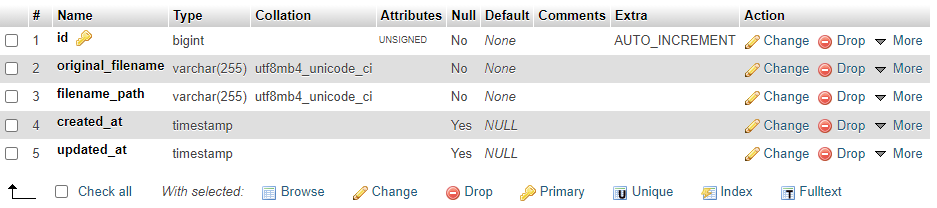
4.) Defining Routes
We define our routes in the routes\web.php file. The first route is the interface that the user will encounter. In the second route, we define the url where we will post our file, and in the third route, we define the url that will work when the user immediately deletes the uploaded file.
// ============== DropZone Example ==================
Route::get('/dropzone-ui', [ UploadController::class, 'dropzoneUI' ])->name('front.dropzone-ui');
Route::post('/upload', [ UploadController::class, 'uploadDropzoneFile' ])->name('front.upload');
Route::post('/file-destroy', [ UploadController::class, 'destroyFile' ])->name('front.file-destroy');
5.) Create Blade View File
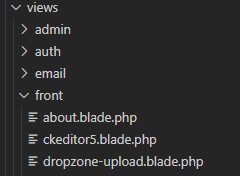
We are creating our view file named dropzone-upload.blade.php as seen in the picture below.
We add bootstrap, jquery and dropzone javascript libraries to the blade file.
<!DOCTYPE html>
<html lang="en">
<head>
    <meta charset="UTF-8">
    <meta http-equiv="X-UA-Compatible" content="IE=edge">
    <meta name="viewport" content="width=device-width, initial-scale=1.0">
    <link rel="stylesheet" href="{{asset('assets/css/bootstrap.css')}}">
  	<link rel="stylesheet" href="https://cdnjs.cloudflare.com/ajax/libs/dropzone/5.7.2/min/dropzone.min.css">
</head>
<body>

<div class="container">
    <h2>Dropzone Example</h2>
    <div class="row justify-content-md-center">
        <div class="col-12">
            <div class="dropzone" id="file-dropzone"></div>
        </div>
    </div>
</div>

<script src="{{ asset('assets/js/jquery.js')}}"></script>
<script src="{{ asset('assets/js/bootstrap.js')}}"></script>
<script src="{{ asset('assets/js/bootstrap.bundle.js')}}"></script>
<script src="https://cdnjs.cloudflare.com/ajax/libs/dropzone/5.7.2/min/dropzone.min.js"></script>
<script>
    Dropzone.options.fileDropzone = {
      url: '{{ route('front.upload') }}',
      acceptedFiles: ".jpeg,.jpg,.png,.gif",
      addRemoveLinks: true,
      maxFilesize: 8,
      headers: {
      'X-CSRF-TOKEN': "{{ csrf_token() }}"
      },
      removedfile: function(file)
      {
        var name = file.upload.filename;
        $.ajax({
          type: 'POST',
          url: '{{ route('front.file-destroy') }}',
          data: { "_token": "{{ csrf_token() }}", name: name},
          success: function (data){
              console.log("File has been successfully removed!!");
          },
          error: function(e) {
              console.log(e);
          }});
          var fileRef;
          return (fileRef = file.previewElement) != null ?
          fileRef.parentNode.removeChild(file.previewElement) : void 0;
      },
      success: function (file, response) {
        console.log(file);
      },
    }
  </script>

</body>
</html>
6-) Creating Controller
We create the controller by running the following line of code.
php artisan make:controller UploadControllerWe write our methods in app\Http\Controllers\UploadController.php file.
namespace App\Http\Controllers;
use Illuminate\Http\Request;
use App\Models\ImageGallery;
class UploadController extends Controller
{
private $photos_path;
public function __construct()
{
$this->photos_path = public_path('/uploads');
}
/**
* Generate Upload View
*
* @return void
*/
public function dropzoneUI()
{
return view('front.dropzone-upload');
}
/**
* File Upload Method
*
* @return void
*/
public function uploadDropzoneFile(Request $request)
{
if (!is_dir($this->photos_path)) {
mkdir($this->photos_path, 0777);
}
if ($request->file('file')) {
$file = $request->file('file');
$fileName = $file->getClientOriginalName();
$filePath = time().'.'.$file->getClientOriginalName();
$file->move(public_path('uploads'), $filePath);
}
$imageUpload = new ImageGallery;
$imageUpload->original_filename = $fileName;
$imageUpload->filename_path = $filePath;
$imageUpload->save();
return response()->json(['success'=>$fileName]);
}
public function destroyFile(Request $request)
{
$filename = $request->get('name');
ImageGallery::where('original_filename',$filename)->delete();
$path = public_path('uploads/').$filename;
if (file_exists($path)) {
unlink($path);
}
return response()->json(['success'=>$filename]);
}
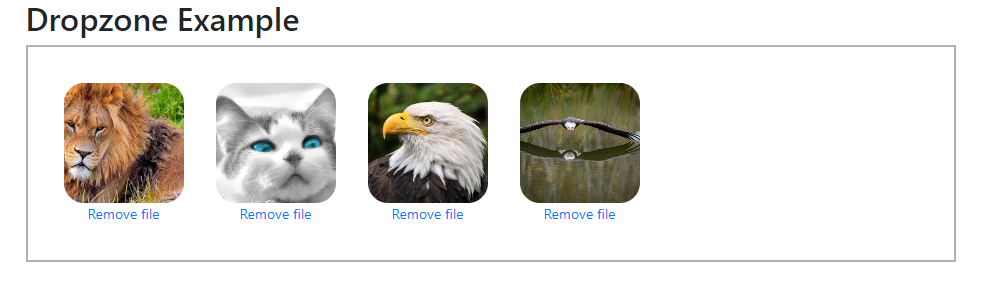
}When we run our project, we can upload our files to the server by dragging and dropping the pictures as below.

Good Luck…