Real-Time Application Development Using Websocket in Django
WebSocket is a computer communication protocol that provides a full duplex communication channel over a single TCP connection. All internet browsers have supported Websockets since 2011.
Application development with Websocket is a popular topic. However, when developing a web application, it must be decided whether it is necessary to develop with websocket.
Which Web Applications can be Developed using Websocket
- Chat Apps
- Real-time push nitifications
- Real-time graph
- Real-time applications (GPS tracking, reading instant data from sensors and taking action) by connecting with IOT devices (such as rasberrypie …)
- Chat bots
Django channels: It is a package that provides long-running connections for Django projects such as WebSockets, MQTT, chatbots, amateur radio and more … . It adds extra features to asynchronous views that come with Django.
Objectives
In this post
- Providing Web sockets support to Django project using Django channels
- Creating a publisher in Jupyter notebook and sending data to Django application with websockets.
- By making a websocket connection in Frontend, we will update the data instantly.
Libraries Needed
For our real-time application, we need to install the following libraries on our computer.
pip install Djangopip install -U channelspip install websocket-clientsettings.py
We need to define channels below INSTALLED_APPS in our settings.py file as follows. In our project, we started the application called liveapp.
INSTALLED_APPS = [
    'channels', # for async app  it must be top place

  	'liveapp'
Since our application will work asynchronously, we need to define it as follows. In learndj project, we created a file named routing.py where we will define urls.
WSGI_APPLICATION = 'learndj.wsgi.application'
ASGI_APPLICATION = 'learndj.routing.application'
If we are going to use CHANNEL_LAYERS that came with Django, we add the following codes. If Redis will be used in real time application, you can use the commented part in the following codes.
CHANNEL_LAYERS = {
"default": {
"BACKEND": "channels.layers.InMemoryChannelLayer"
},
}
# CHANNEL_LAYERS = {
# "default": {
# "BACKEND": "channels_redis.core.RedisChannelLayer",
# "CONFIG": {
# "hosts": [("localhost", 6379)],
# },
# },
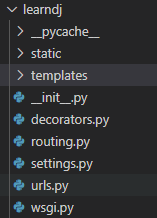
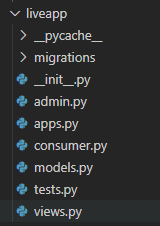
# }The file structure of our learndj project is as follows.
routing.py
After creating the routing.py file, we will use the following codes. When defining the websocket url, we add ws/ prefix to separate it from other urls.
Consumer class that will run when a request is made to the websocket url is the DashConsumer class in the consumer.py file we created.
from channels.routing import ProtocolTypeRouter, URLRouter
from channels.auth import AuthMiddlewareStack
from django.urls import path
from liveapp import consumer

websocket_urlPattern = [
    #In routing.py, "as_asgi()" is required for versions over python 3.6.
    path('ws/pollData', consumer.DashConsumer.as_asgi()), # add ws for prefix.
]

application = ProtocolTypeRouter({
    'websocket':AuthMiddlewareStack(URLRouter(websocket_urlPattern ))
})
consumer.py
Consumers are the equivalent of view functions in Django. We created our file named consumer.py in liveapp application.
We have defined consumer functions that will work with the code block below. A user connecting to the websocket url of our application will be added to the dashboard group.
from channels.generic.websocket import AsyncJsonWebsocketConsumer
import json

class DashConsumer(AsyncJsonWebsocketConsumer):
    print('==================')
    async def connect(self):
        self.groupname='dashboard'
        await self.channel_layer.group_add(
            self.groupname,
            self.channel_name,
        )
        await self.accept()

    async def disconnect(self,close_code):
        await self.channel_layer.group_discard(
            self.groupname,
            self.channel_name
        )

    async def receive(self, text_data):
        datapoint = json.loads(text_data)
        val =datapoint['value']

        await self.channel_layer.group_send(
            self.groupname,
            {
                'type':'deprocessing', #function name to run
                'value':val #value to send function
            }
        )
        print ('>>>>',text_data)

    async def deprocessing(self,event):
        valOther=event['value']
        valOther = f'IP VALUE: {valOther}'
        await self.send(text_data=json.dumps({'value2':valOther}))# send for frontend
The python script that will connect to our application and send data in json format is as follows. Data generated instantly in Jupyter notebook will be rendered in template.
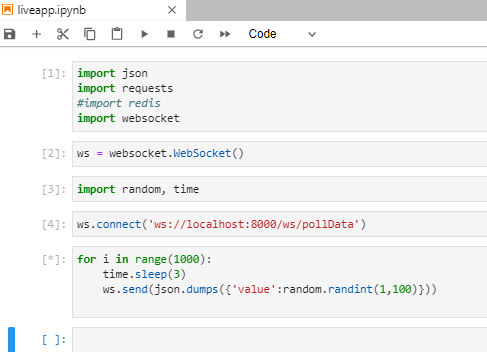
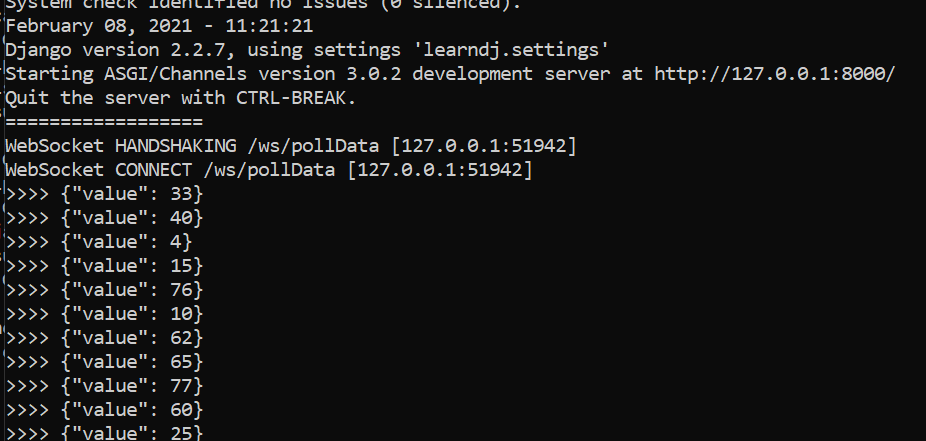
When we run Jupyter notebook, we print the incoming data in the receive function in consumer.py. We can see the printed json data in the command line where we run django as in the picture below.
We create a template named live_app.html and add the following code block inside.
<h2>Live APP</h2>
<h3 id='poll_data'>Data</h3>
<script>
const myDiv = document.getElementById('poll_data')
let socket = new WebSocket('ws://localhost:8000/ws/pollData');
socket.onopen = function(e){
alert('connection established');
}
socket.onmessage = function(e){
console.log(e.data);
result = JSON.parse(e.data);
myDiv.textContent = result.value2;
}
socket.onclose = function(e){
alert('connection closed');
}
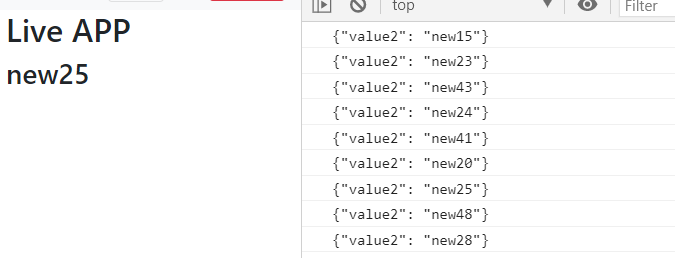
</script>When we define any url and view that will render this template, we can see that the data is updated instantly as in the picture below.
Good Luck …